Managing POS items and Recipes

About POS items and Recipes
When connecting your POS system with RapidStock, all POS items will be imported and listed on the POS items page. Adding ingredients to these POS items enables RapidStock to determine which product and how much of it needs to be deducted from your on-hand inventory each time a sale is recorded.
For example, a POS item named Orange juice glass is imported on the RapidStock Recipes page and adding 200ml of your Brand X Orange juice product will let RapidStock “know” that each time someone punch the Orange juice glass in your POS, we need to deduct 200ml of Brand X Orange juice from your inventory.
Difference between POS items and Recipes
POS items are recipes that are imported from your POS automatically through the integration. Every items that you sell to customers is a POS item, even if it has only one ingredient.
Recipes, on the other hand, act as groups of multiple products. Usually, they are batches that are prepared in advance like a custom dressing or a pre-mixed drink.
There’s 2 main benefits of batch recipes:
- They can be added into other recipes in smaller portions (like a custom salad dressing or a sauce)
- They can be counted or weighed in your inventories
Important information about POS items
- POS items are synced automatically from your POS daily or by clicking the “Update POS items from [your pos name]” button on the POS items page
- The POS integration is downstream, meaning that you should edit POS items names in your POS and not in RapidStock.
- Ingredients need to be added and managed inside RapidStock’s only, not in your POS
- A missing ingredient warning (red martini glass icon) will display in the warnings column of the Recipes page and will help you see new recipes that need to have ingredients added to them
Filtering POS items
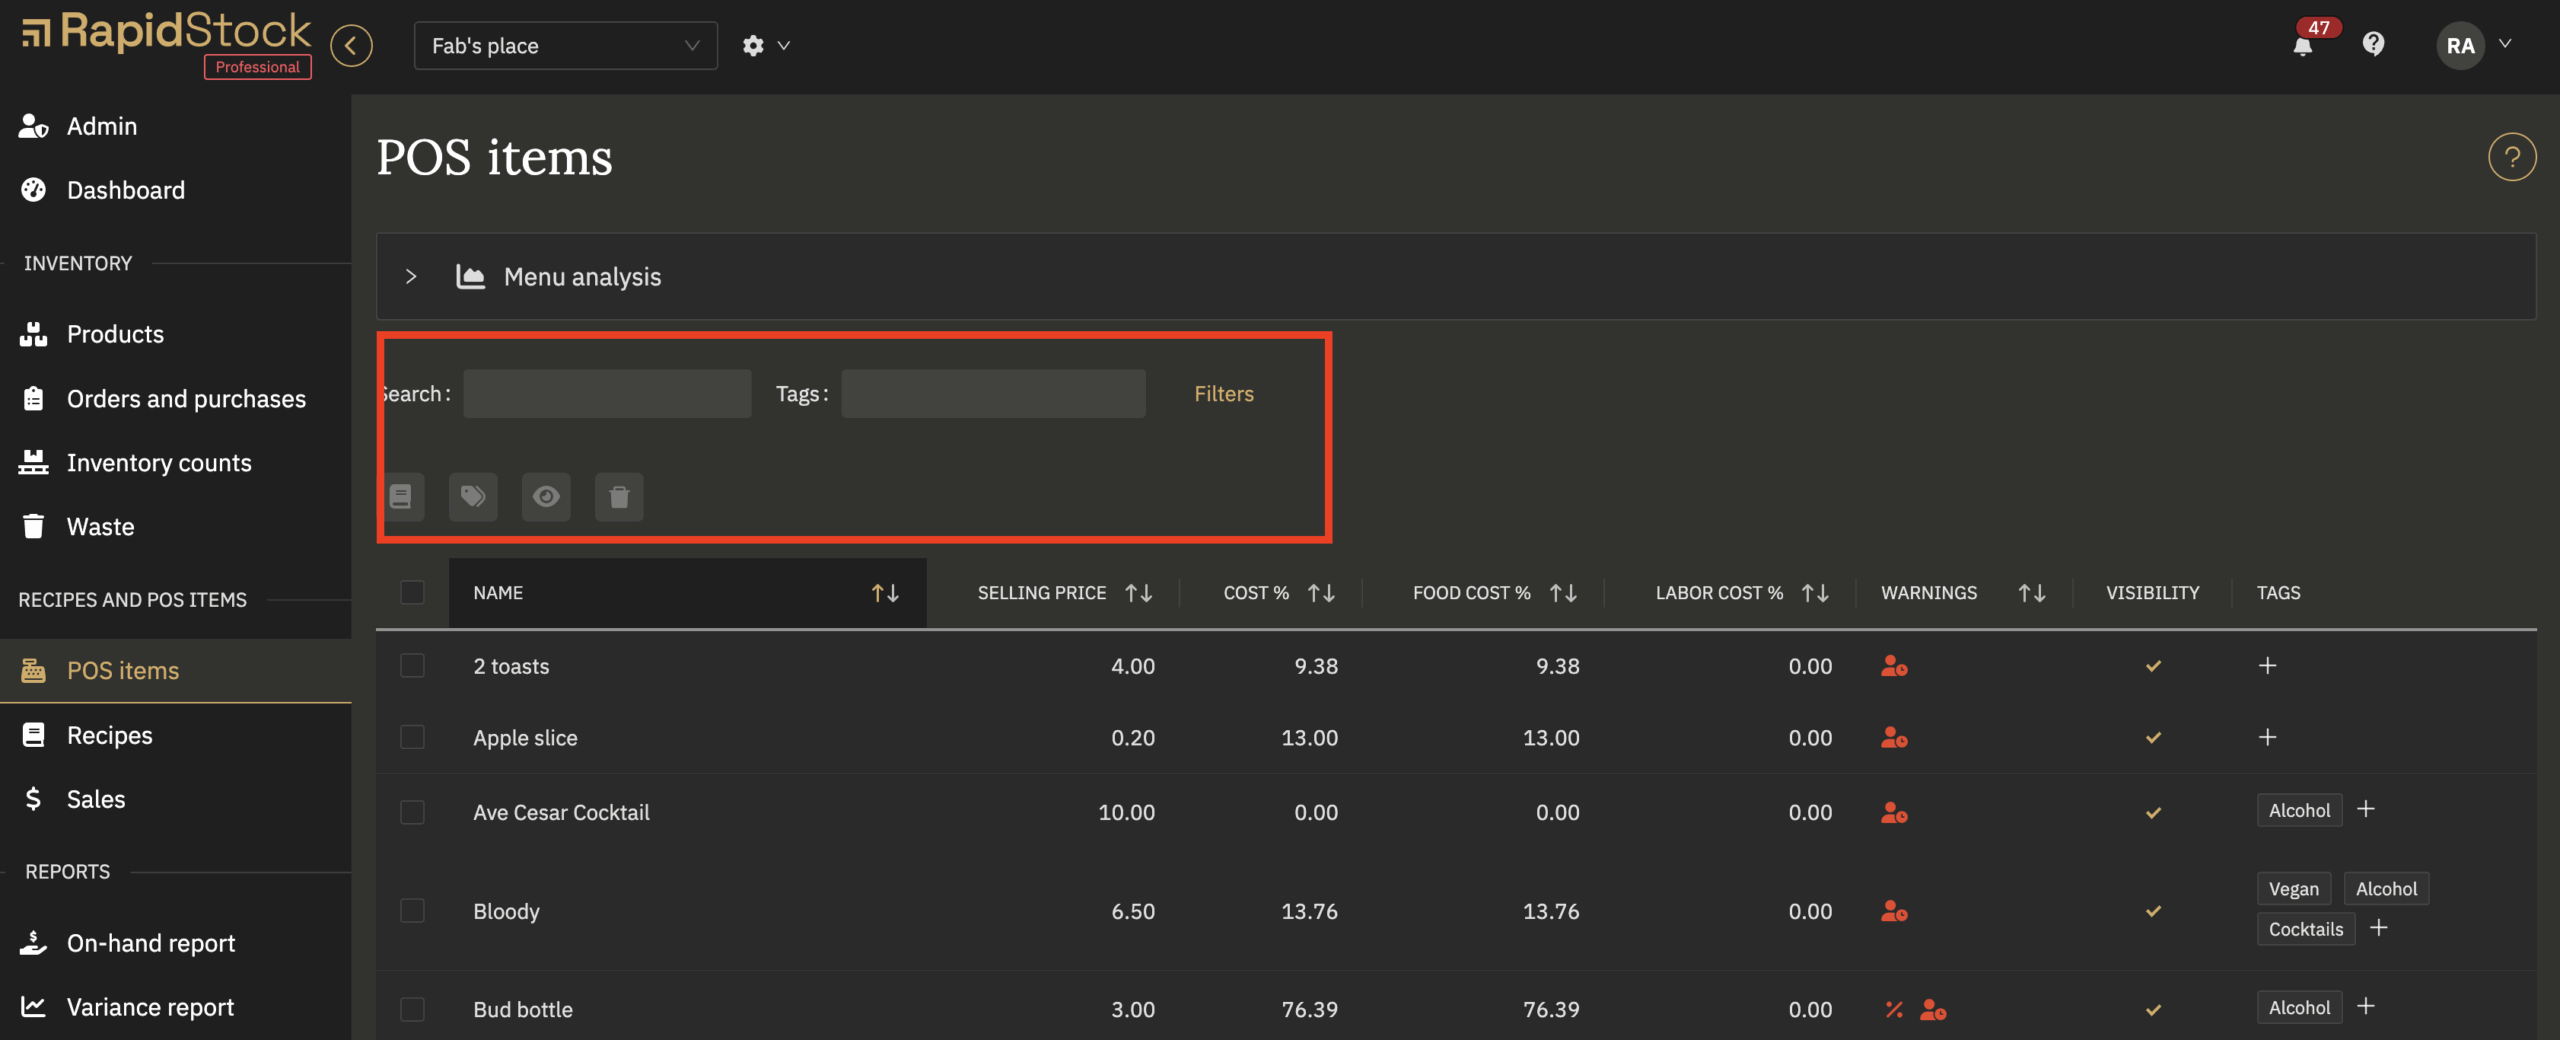
POS items and recipes can be searched or filtered using RapidStock’s many filters. You can sort them by warnings (to find the ones that don’t have ingredients yet for example) or by type (POS items vs batch).
You can also add different tags to view exactly what you need. E.g. adding Kitchen and Bar tags can allow you to view only the POS items that are relevant to your department.
Active and inactive POS items

Sometimes, you’ll have a POS item in the POS that you don’t want to be visible in RapidStock.
But because POS items are synced daily from your POS, deleting a POS item that is still present in your POS will only delete it temporarily: the POS item will be re-created once the integration runs again.
To let you hide POS items that are present in the POS but that you don’t need in RapidStock, you can de-activate them by unchecking the Active column check box. The Status filter at the top of the list let you select between viewing Active, inactive or all POS items.
Adding products (ingredients) to POS items and recipes
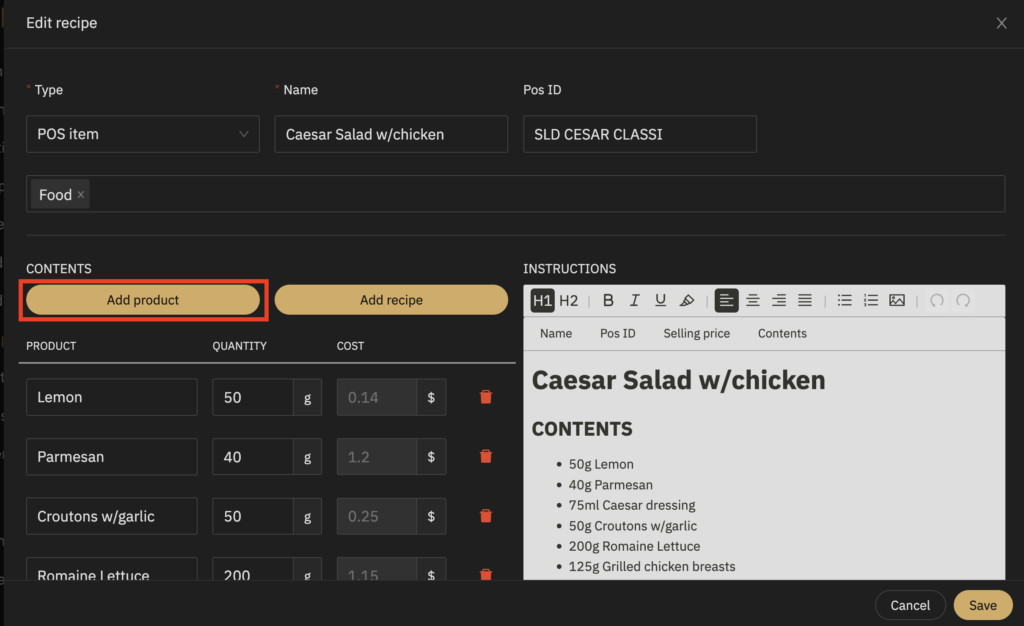
- Select a POS items from the list
- Start typing the first letters of the product you want to add as an ingredient and select it from the suggestions
- Enter the quantity of the product that is present in that POS items
Tips:
I can’t find a product when typing its name
The product probably doe not exist or is named differently. Try to go to the product page to find the right name or create a new product
The unit is “un” but I want to set my quantity in “ml” (or oz, g, etc.)
Go to the products pages, find the product and change the value of the “Recipe unit” selector to the desired unit
Adding recipes to POS items
Professional edition only.
Similar to adding products, you can click the “Add recipe” button to add any recipe to an existing POS items or Recipe. E.g. In a Caesar Salad POS items, you could add 80ml of the Caesar dressing recipe.
Adding instructions and pictures
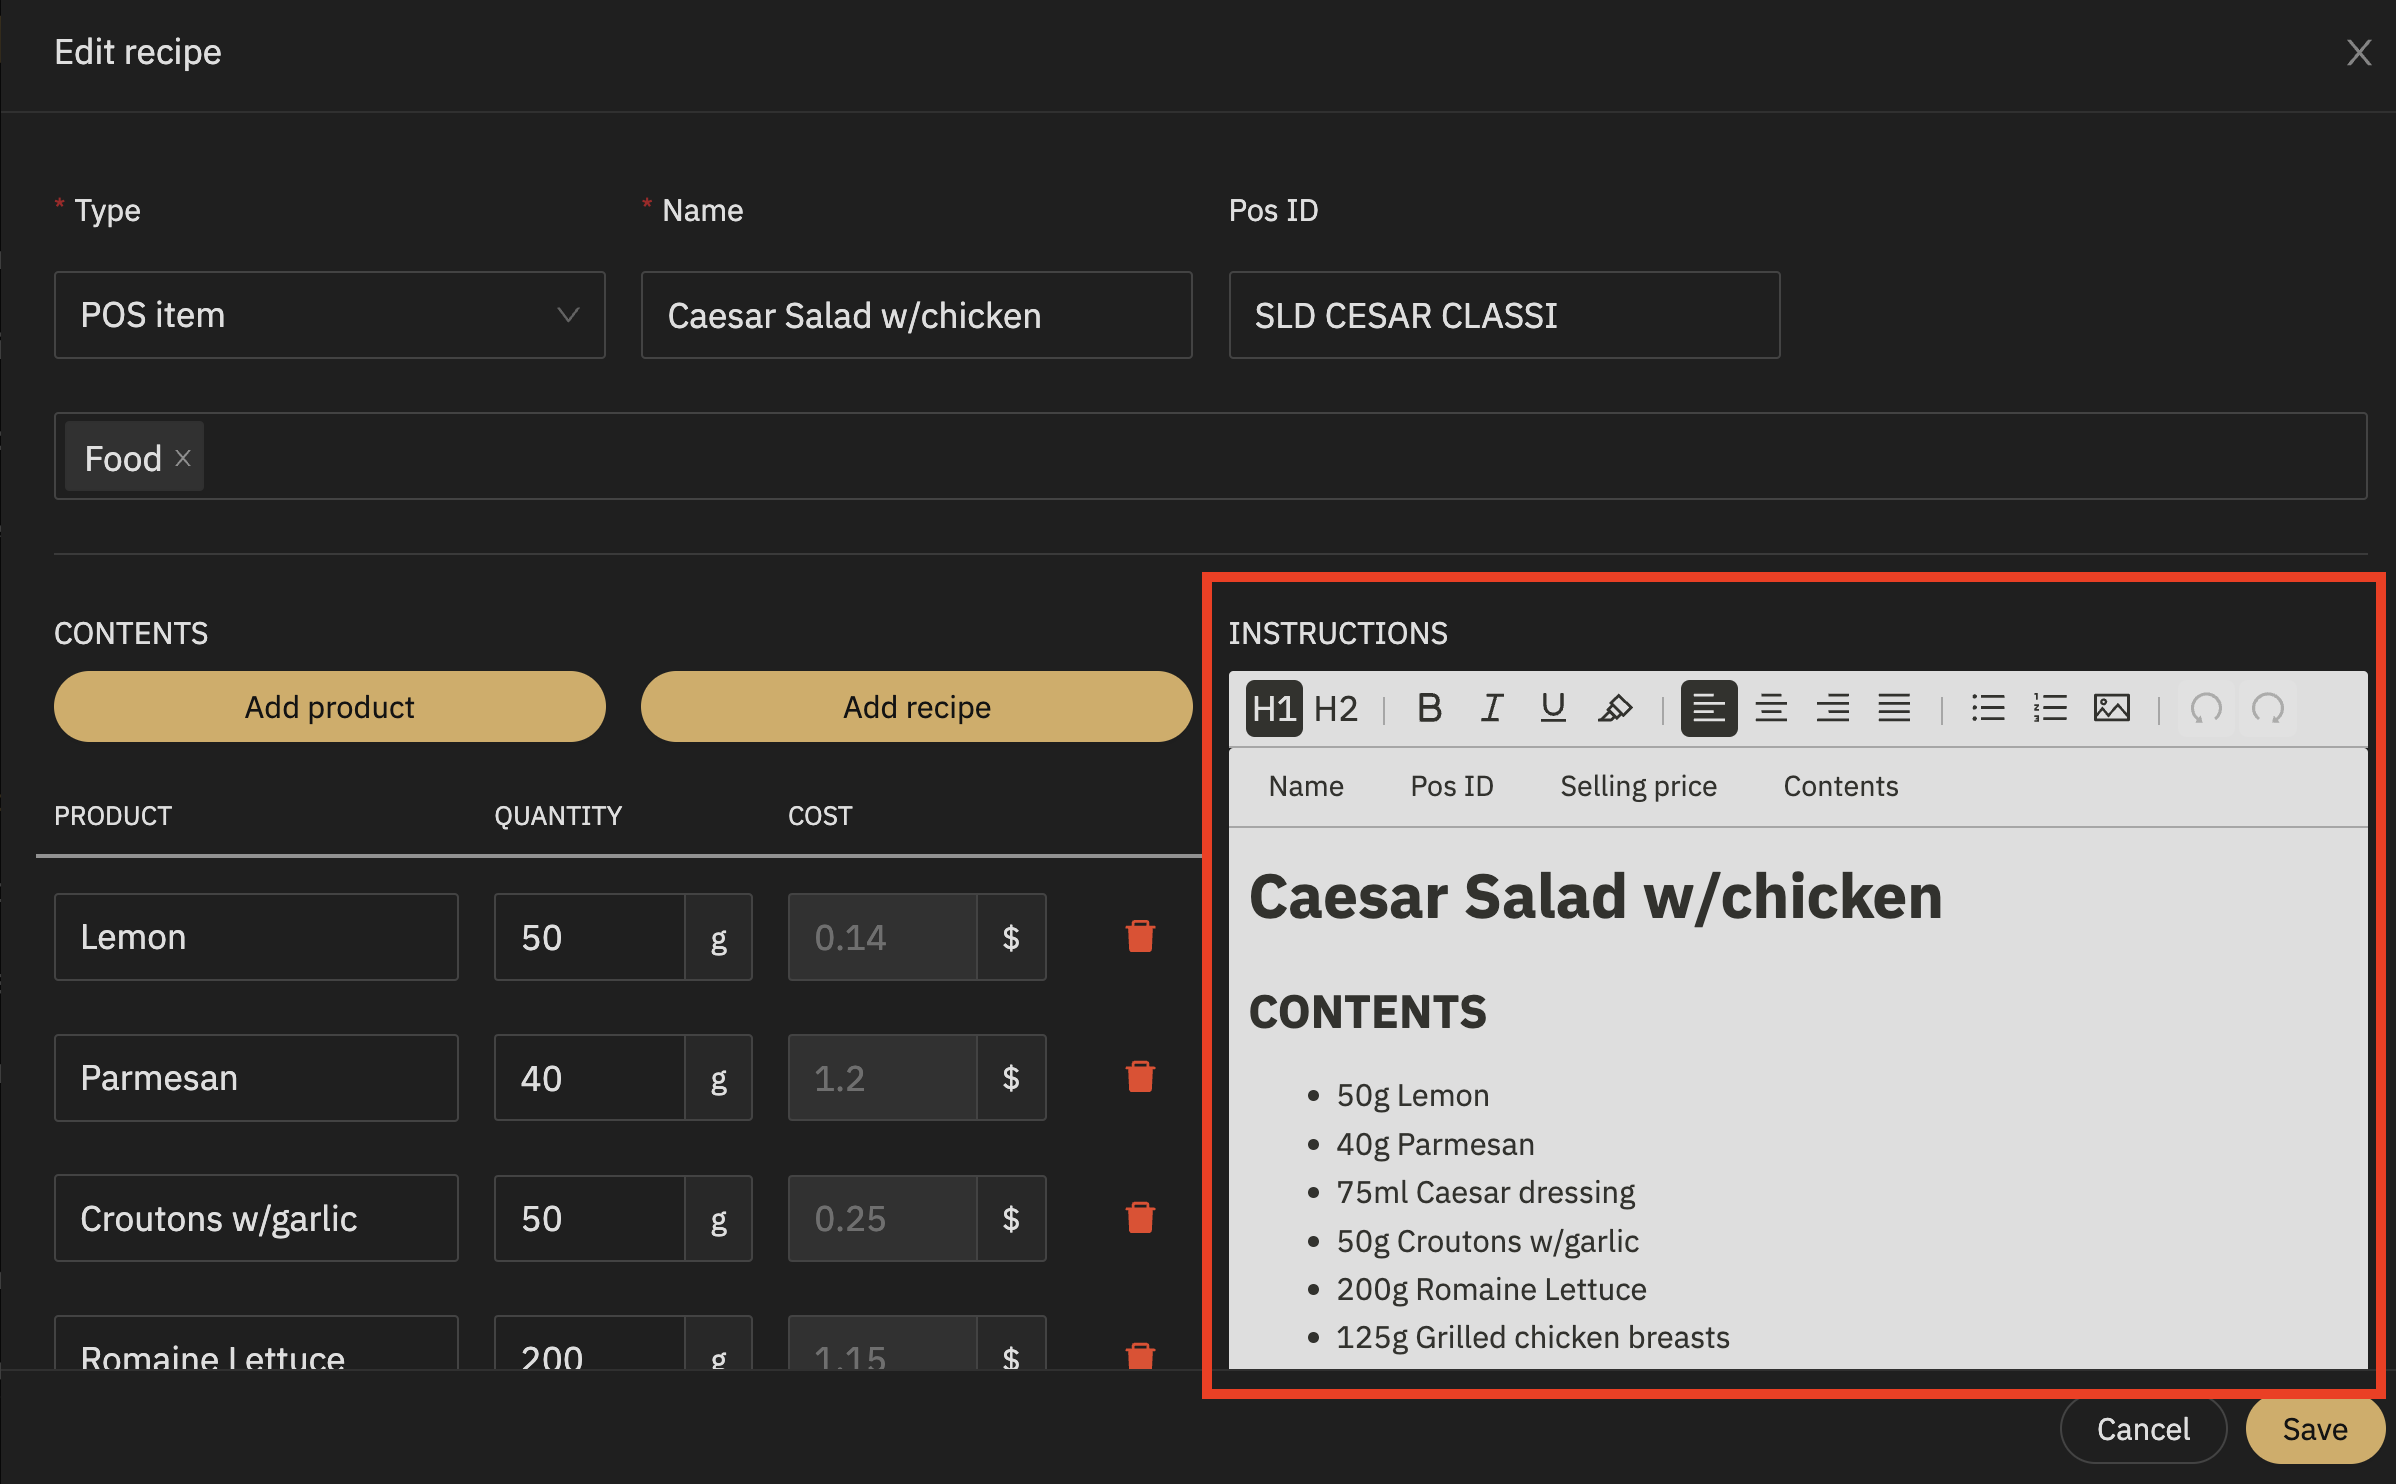
The text editor on the right of the Content section lets you insert the POS items data (using the Name, POS id, Selling price and Content shortcuts) or any text like you would in a regular text editor. The picture icon lets you insert an image in the editor. When this section is filled, you can export it in PDF format to be printed or shared with your team.